How to Install Windows 2003 R2
In this tutorial we will demonstrate to you the installation procedure for Windows 2003 R2 Operating System.
To make things easier for you, we have automated the entire installation process. Now you will only need to start the installation and then set a password for the Windows OS.
Step 1:
Login to your VPS Control Panel and click on the button at the right labeled "Manage". The screenshot for the same is given below.

Step 2:
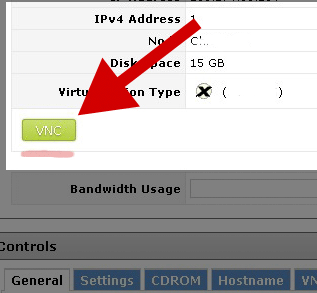
Once you are done with Step 1, you will be presented will a screen as shown below. Click on the button labeled "VNC".
Step 3:
Now in the VNC area you are shown that you have unpartitioned space on your drive. Press enter and move on to the next step.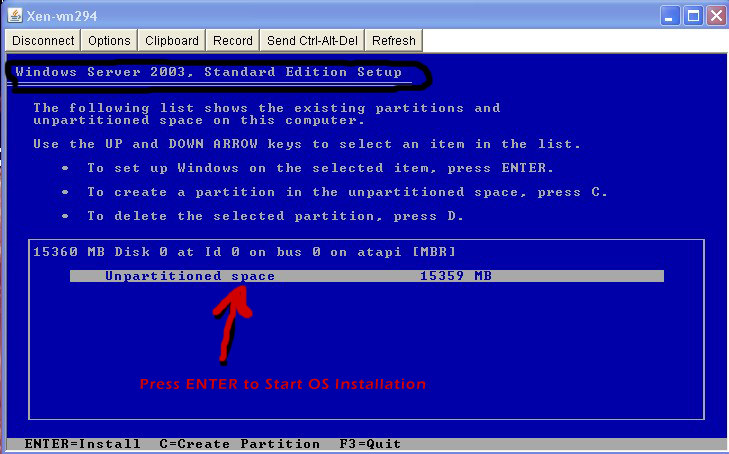
Step 4:
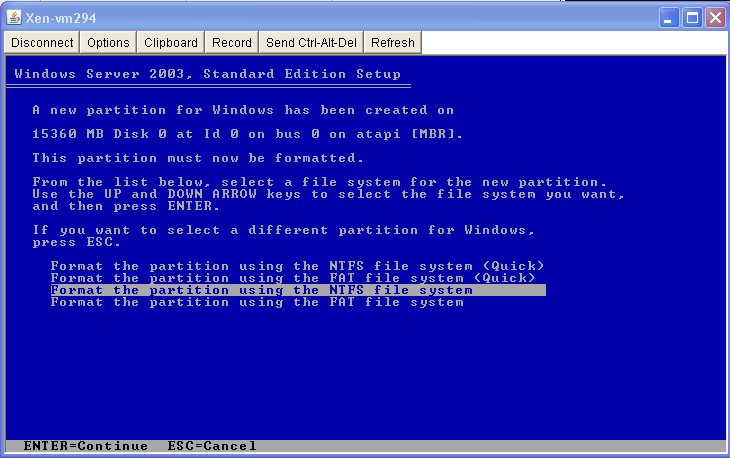
In this screen you are presented with 4 ways to partition your drive. We advice you to select the 3rd option as it provides the best performance, however do not change the default option. Press Enter.
Imp: The process of formatting and installing the OS can take 15 to 20 minutes. VNC will automatically close when the hard drive is formatted. You will then notice an error "VNC Error: Click here to Login Again". Click on "Login Again".
Step 5:
When the installation is complete, you will be presented with a Login option which asks you to press "Ctrl-Alt-Del". You will need to click on the option "Send Ctrl-Alt-Del" which is present at the top menu bar of your VNC area.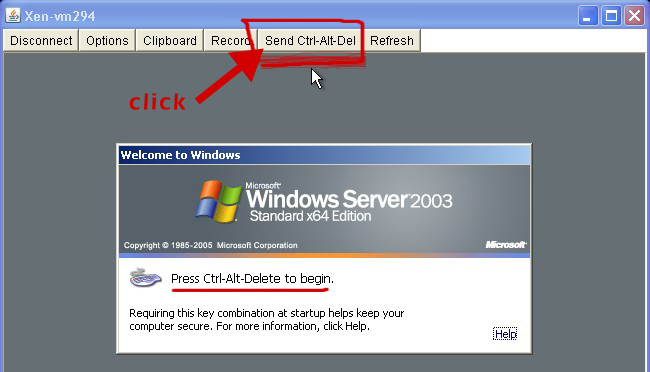
Step 6:
By default, there is no password for this installation. However the "Login to Windows" option will have both the Username and Password field. The Username you will need to give is "Administrator", leave the Password field blank. Click the "OK" button.
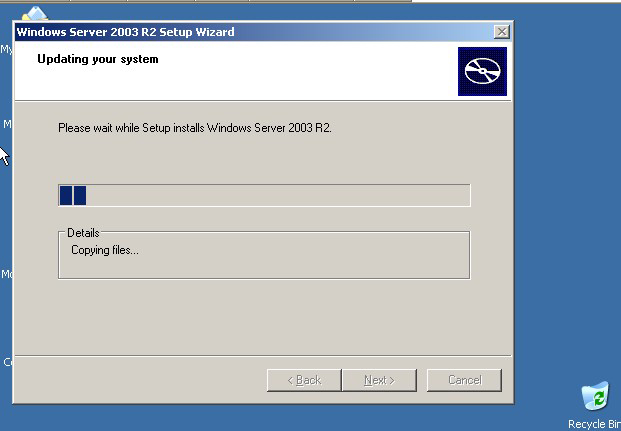
Windows will now present to you a series of messages such as "Please wait... Initializing Windows" etc. When presented with the "Windows Server 2003 R2 Setup Wizard" box, click "Next" and wait for Windows to complete the copying of files. Once done click "Finish".
Step 7:
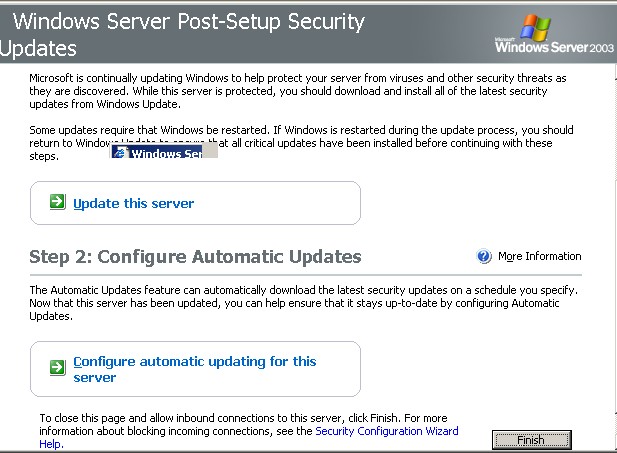
In the "Windows server post-setup security Update" page, scroll down to the button labeled "Finish" and Click it.
Imp: For the security of your Windows, it is required to complete a post setup security installation and therefore you will need to follow our post setup installation process.
Step 8:
The following are the steps you need to follow to set a Password for your Windows Administrator Account:
Navigate to the following component from the Start Menu:
Start Menu >> All Programs >> Administrative Tools >> Computer Management
In Computer Management navigate to:
Expand System Tool >> Local Users and Groups >> Users >> Right Click on "Administrator" >> Click on "Set Password"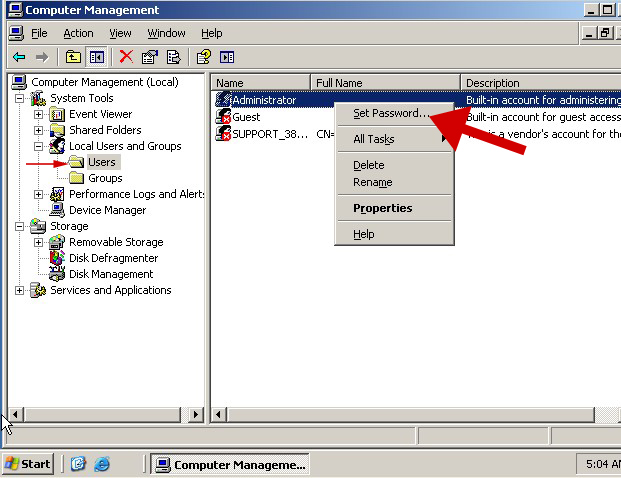
Step 9:
Upon clicking "Set password", you will be shown a warning box with 3 options. Click "Proceed". Windows will then show the "Set password for Administrator" option, enter your new password and also confirm it. If the password is successfully changed, then a message will be displayed saying so. Click "OK".
Since our Remote Desktop Account is enabled by default, you can access your Remote Desktop account using your VPS IP, Administrator username and Password.
Below we show you an example of your RDP Login details.
IP Address: Your VPS IP
User: Administrator
Password: Your newly set Password.
