Video Tutorial:
Step by Step Text Tutorial with Images...
How Can I Change my Default Remote Desktop Port?
Step 1: Login to your Windows VPS RDP Account, Go To "Start Menu" and then type "regedit.exe" (without quota) in search box and then click on regedit.exe result.
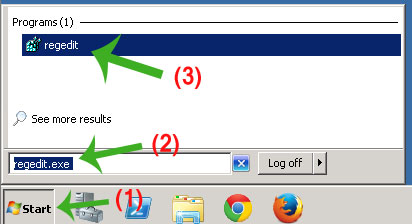
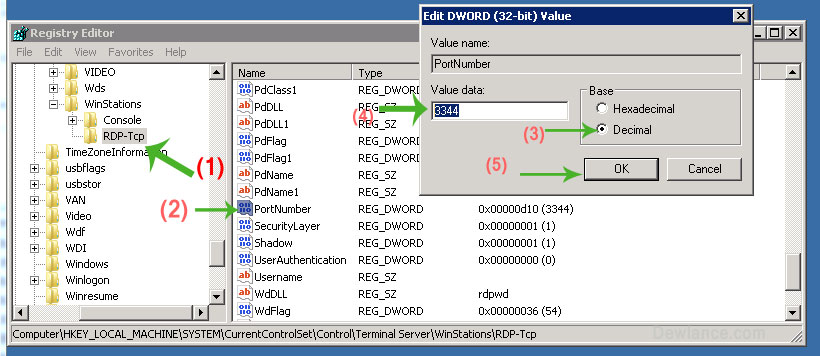
Step 2: In Registry Editor(Regedit), Locate and then click the following registry subkey:
HKEY_LOCAL_MACHINE\System\CurrentControlSet\Control\TerminalServer\WinStations\RDP-Tcp\PortNumber
1. On the Edit menu, click Modify, and then click Decimal.
2. Type the new port number, and then click OK.
3. Exit from Registry Editor.
Allow your new custom RDP Port in Windows Firewall
Step 3: As you can see, we changed our default RDP Port from 3389 to 3344 but now we need to add our new custom port in Firewall Inbound TCP Rule.
1. Go to Start Menu, Type "Firewall" and then click on "Windows Firewall with Advanced Security"
2. In Windows Firewall, Click on "Inbound Rules"(Left Side) and then click on "New Rules" (You can find this option In Right Side)

3. In "New Inbound rule Wizard" Click on "Port Option" and then click on "Next" button.
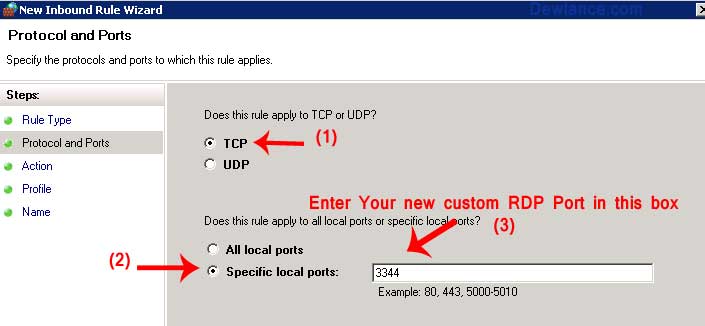
4. In Protocol and Ports,Select "TCP" and Enter your new RDP Custom Port number in "Specific Local Ports" and then click on "Next" button
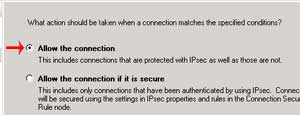
5. Again click on "Next" Button
6. Enter Firewall Rule name like "My Custom RDP Port", Click on "Next" Button and Close Firewall Application and then Restart your VPS.
How can I access my Windows RDP with my New Custom Port?
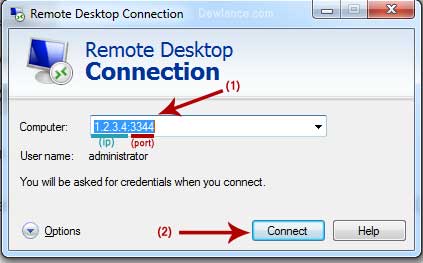
After restarting your VPS, Wait for few minute and then open Remote Desktop Application on your Local PC and If your VPS IP Address is 1.2.3.4 and your new custom RDP Port is 3344 then enter 1.2.3.4:3344 (IP:Port) in Computer Field and then click on "Connect" Option.
